SlaughterhouseA (EU2012): Difference between revisions
No edit summary |
No edit summary |
||
| Line 13: | Line 13: | ||
<br clear="all"> | <br clear="all"> | ||
<gallery widths=200px heights=150px perrow=4> | <gallery widths=200px heights=150px perrow=4> | ||
File:SLAUGHTERHOUSE_A (EU2012).png | File:SLAUGHTERHOUSE_A (EU2012).png|Slaughterhouse A loading screen | ||
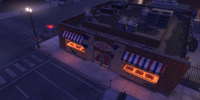
File:SlaughterhouseA 1 (EU2012).png | File:SlaughterhouseA 1 (EU2012).png|Slaughterhouse A LZ overview | ||
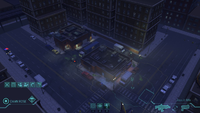
File:SlaughterhouseA 2 (EU2012).png | File:SlaughterhouseA 2 (EU2012).png|Slaughterhouse A opposite overview | ||
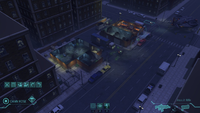
File:SlaughterhouseA 3 (EU2012).png|Bomb Disposal variant | File:SlaughterhouseA 3 (EU2012).png|Bomb Disposal variant | ||
</gallery> | </gallery> | ||
Latest revision as of 17:50, 13 October 2013
| Missions | Abductions, Bomb Disposal |
| Length | 55 tiles |
| Width | 28 tiles |
| Area | 1540 tiles |
Notes
- Starting Location - on the street, outside the butcher shop.
- One node is tucked in next to a chain-link fence: you cannot deactivate it from the other side of the fence.
- The bomb is located inside the warehouse behind the butcher shop.
-
 Slaughterhouse A loading screen
 -
 Slaughterhouse A LZ overview
 -
 Slaughterhouse A opposite overview
 -
 Bomb Disposal variant
.png)
.png)
.png)
.png)