HighwayBridge (EU2012): Difference between revisions
mNo edit summary |
No edit summary |
||
| Line 1: | Line 1: | ||
{{Map Data Box (EU2012) | |||
|missions=Abductions, Council (Bomb Disposal) | |||
|length=76 tiles | |||
|width=20 tiles | |||
|area=1520 tiles | |||
}} | |||
'''Notes''' | '''Notes''' | ||
| Line 17: | Line 12: | ||
* For a Squadsight Sniper, this map is basically a shooting gallery, especially with Archangel Armor. | * For a Squadsight Sniper, this map is basically a shooting gallery, especially with Archangel Armor. | ||
<gallery widths=200px heights=150px perrow=4> | |||
File:HighwayBridge.png|Loading screen | |||
File:HighwayBridge 1 (EU2012).png|LZ overview | |||
File:HighwayBridge 2 (EU2012).png|Opposite overview | |||
</gallery> | |||
{{Template:Maps Navbar (EU2012)}} | {{Template:Maps Navbar (EU2012)}} | ||
{{EU2012 Style}} | {{EU2012 Style}} | ||
Revision as of 17:03, 16 September 2013
| Missions | Abductions, Council (Bomb Disposal) |
| Length | 76 tiles |
| Width | 20 tiles |
| Area | 1520 tiles |
Notes
- Starting location - towards the bottom of the map.
- There are a few semi trucks providing high cover, and a lot of cars providing low cover.
- In Bomb Disposal missions the Bomb is in the center at the far end of the map.
- For a Squadsight Sniper, this map is basically a shooting gallery, especially with Archangel Armor.
-
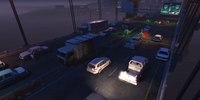 Loading screen
 -
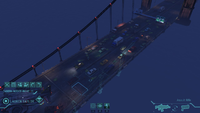 LZ overview
 -
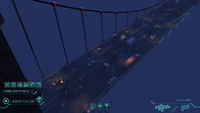 Opposite overview

.png)
.png)